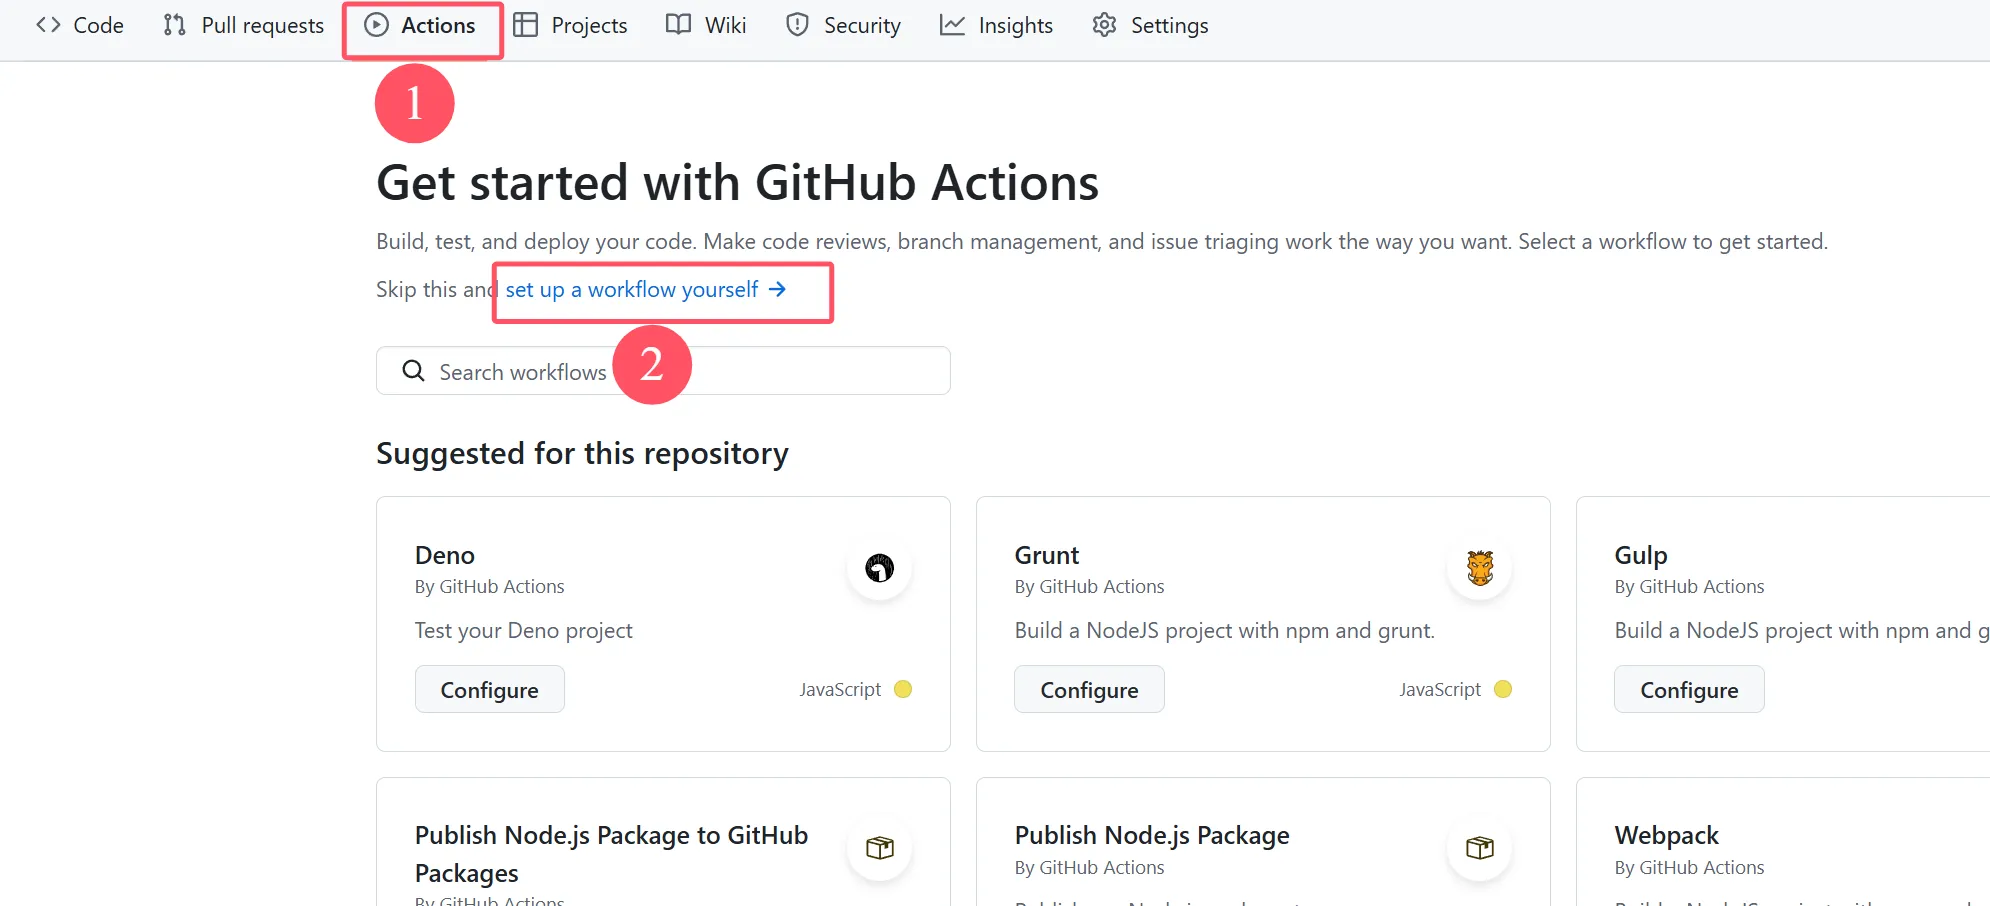
首先打开Actions页面 新建workflow(第一种方法 )
- 首先打开你Fork的项目,打开Actions页面,点击new workflow,选择set up a workflow yourself进入编辑页面。
编辑文件
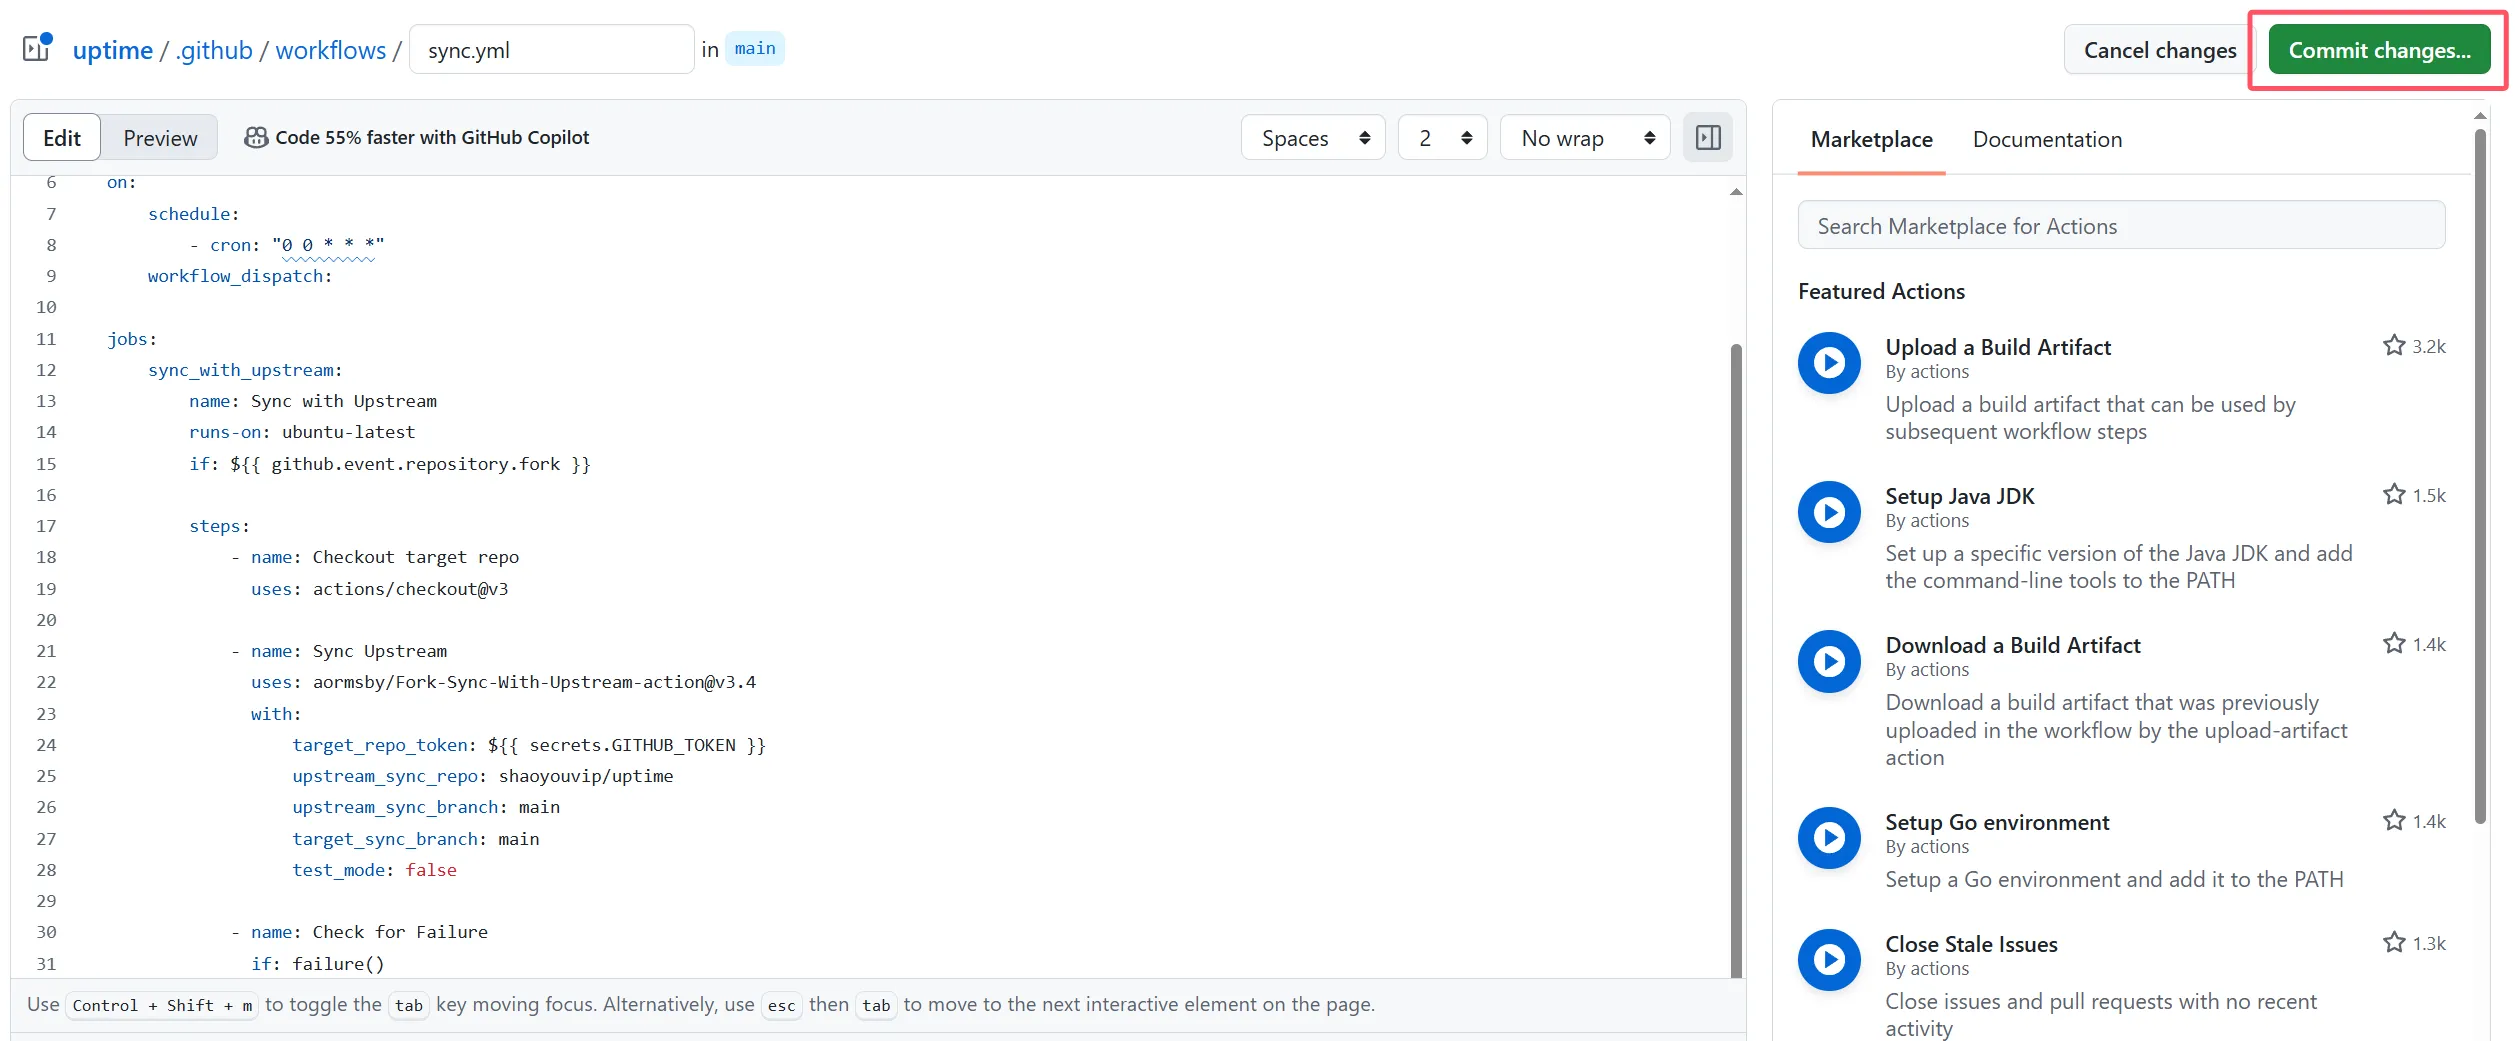
- 文件取名为sync.yml,然后输入以下代码:
name: Upstream Sync
permissions: contents: write
on: schedule: - cron: "0 0 * * *" workflow_dispatch:
jobs: sync_with_upstream: name: Sync with Upstream runs-on: ubuntu-latest if: ${{ github.event.repository.fork }}
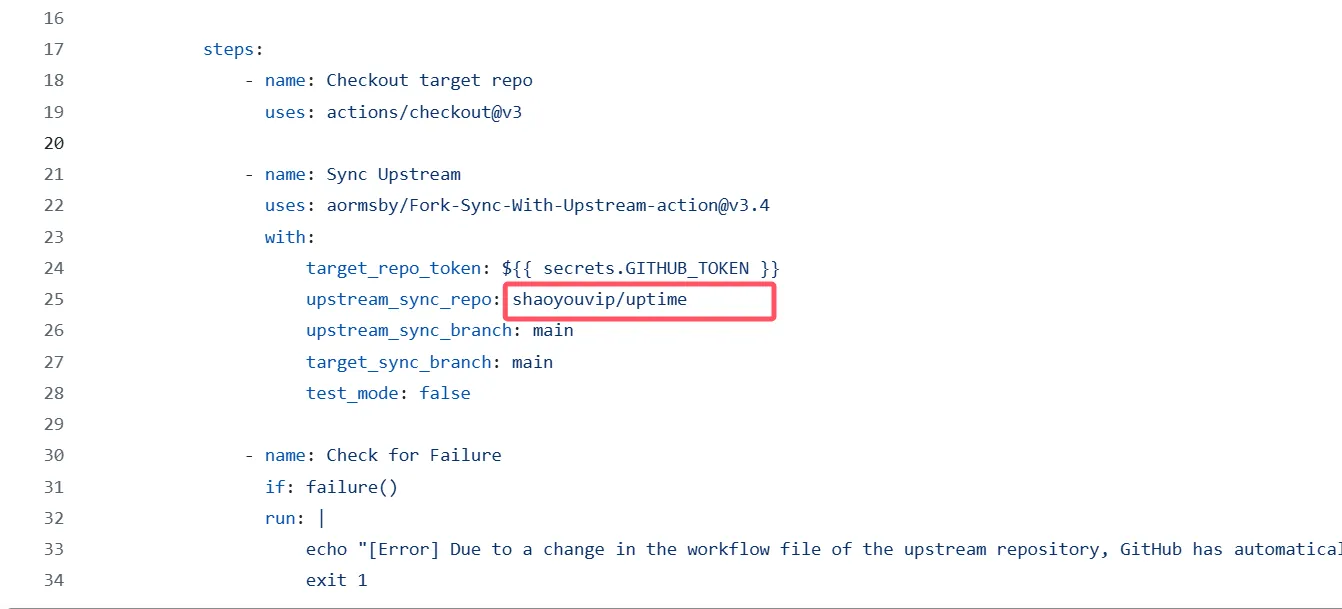
steps: - name: Checkout target repo uses: actions/checkout@v3
- name: Sync Upstream uses: aormsby/Fork-Sync-With-Upstream-action@v3.4 with: target_repo_token: ${{ secrets.GITHUB_TOKEN }} upstream_sync_repo: shaoyouvip/uptime upstream_sync_branch: main target_sync_branch: main test_mode: false
- name: Check for Failure if: failure() run: | echo "[Error] Due to a change in the workflow file of the upstream repository, GitHub has automatically suspended the scheduled automatic update. You need to manually sync your fork." exit 1修改配置
-
定时任务执行间隔
- 修改cron项,这里是 ** 0 0 * * * **,代表每天0点执行一次
-
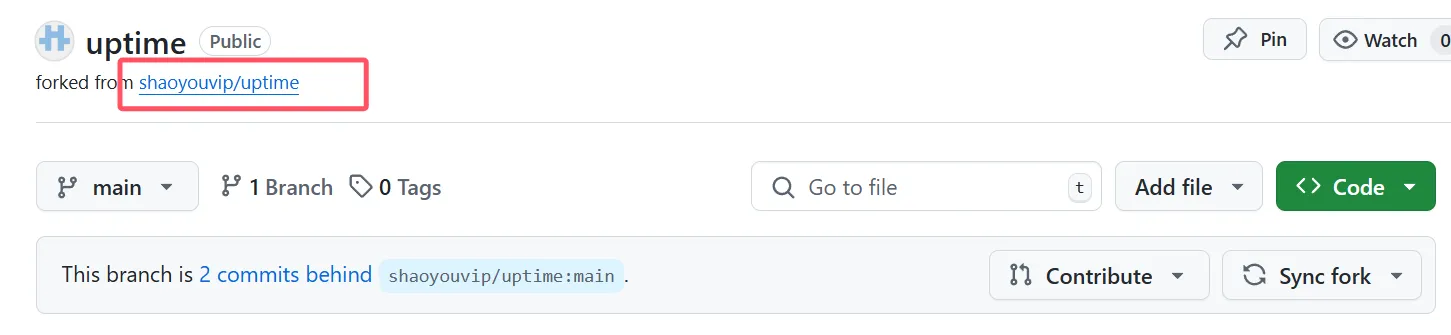
要同步的仓库路径
- 修改 upstream_sync_repo 项,这里要填你fork的仓库路径,在你fork项目的的名字下方能看到。
-
同步分支名称( 超级无敌要注意 )
- 修改 upstream_sync_branch 和 target_sync_branch 项,填写你要同步分支的名称,例如我填的main,一般来说fork的分支名称都一样,但这只是一般情况,也有的老项目默认的分支不是main,在 Sync Upstream 步骤中请一定确保你上游项目的分支路径。
提交保持文件
- 填写完成后点右上角 commit changes ,然后确认。

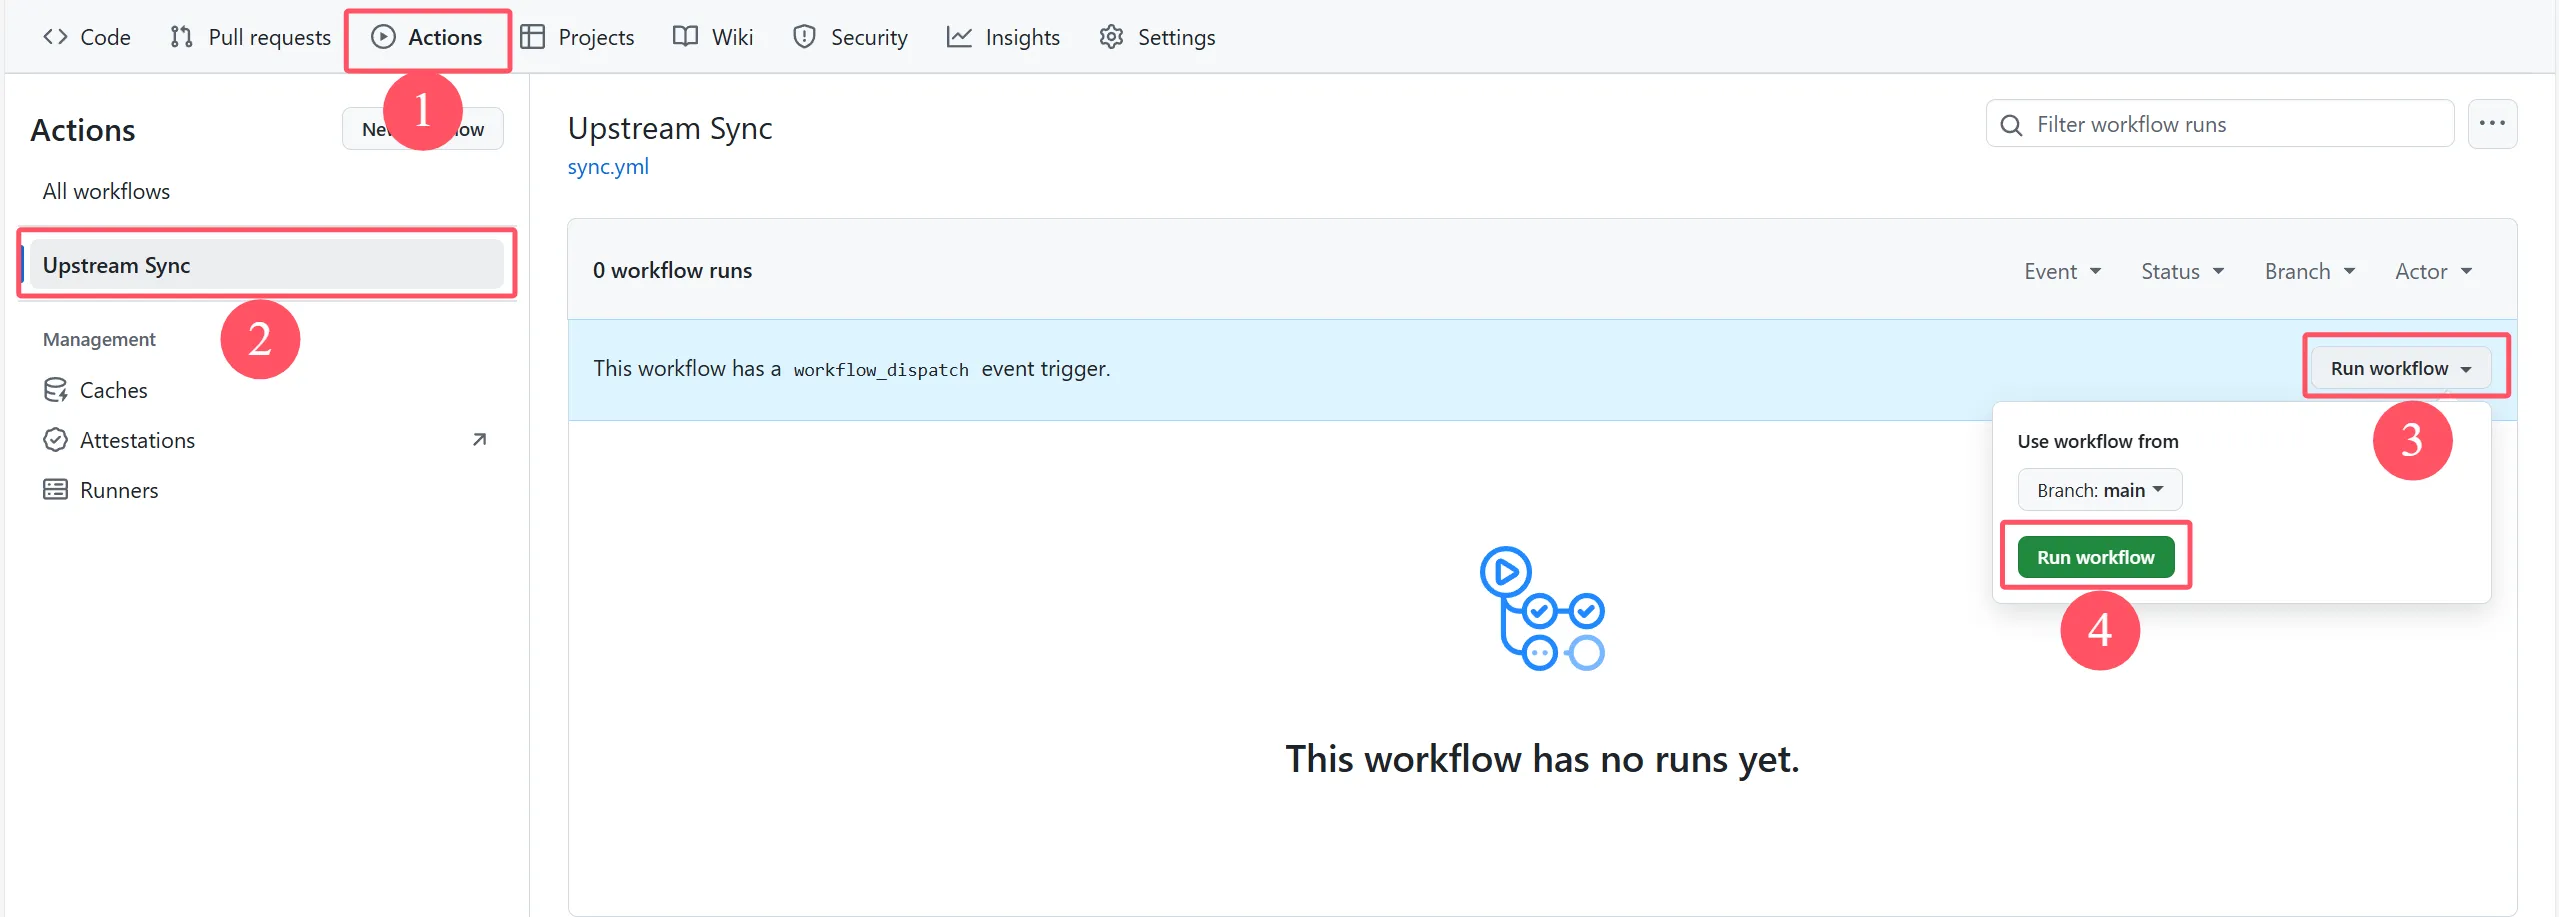
测试运行
- 回到 Actions 页面,点击你刚刚创建的 workflow ,点击 Run workflow
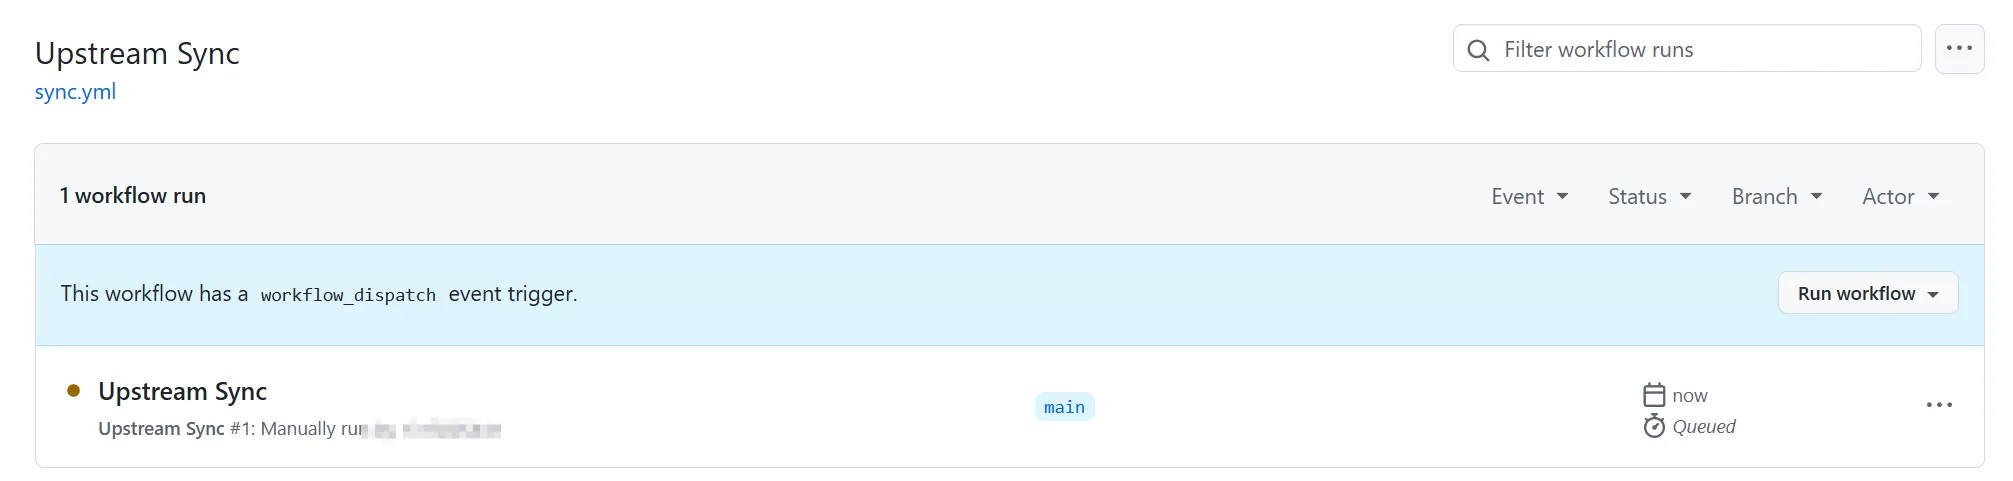
运行成功
- 刷新页面可以看到效果

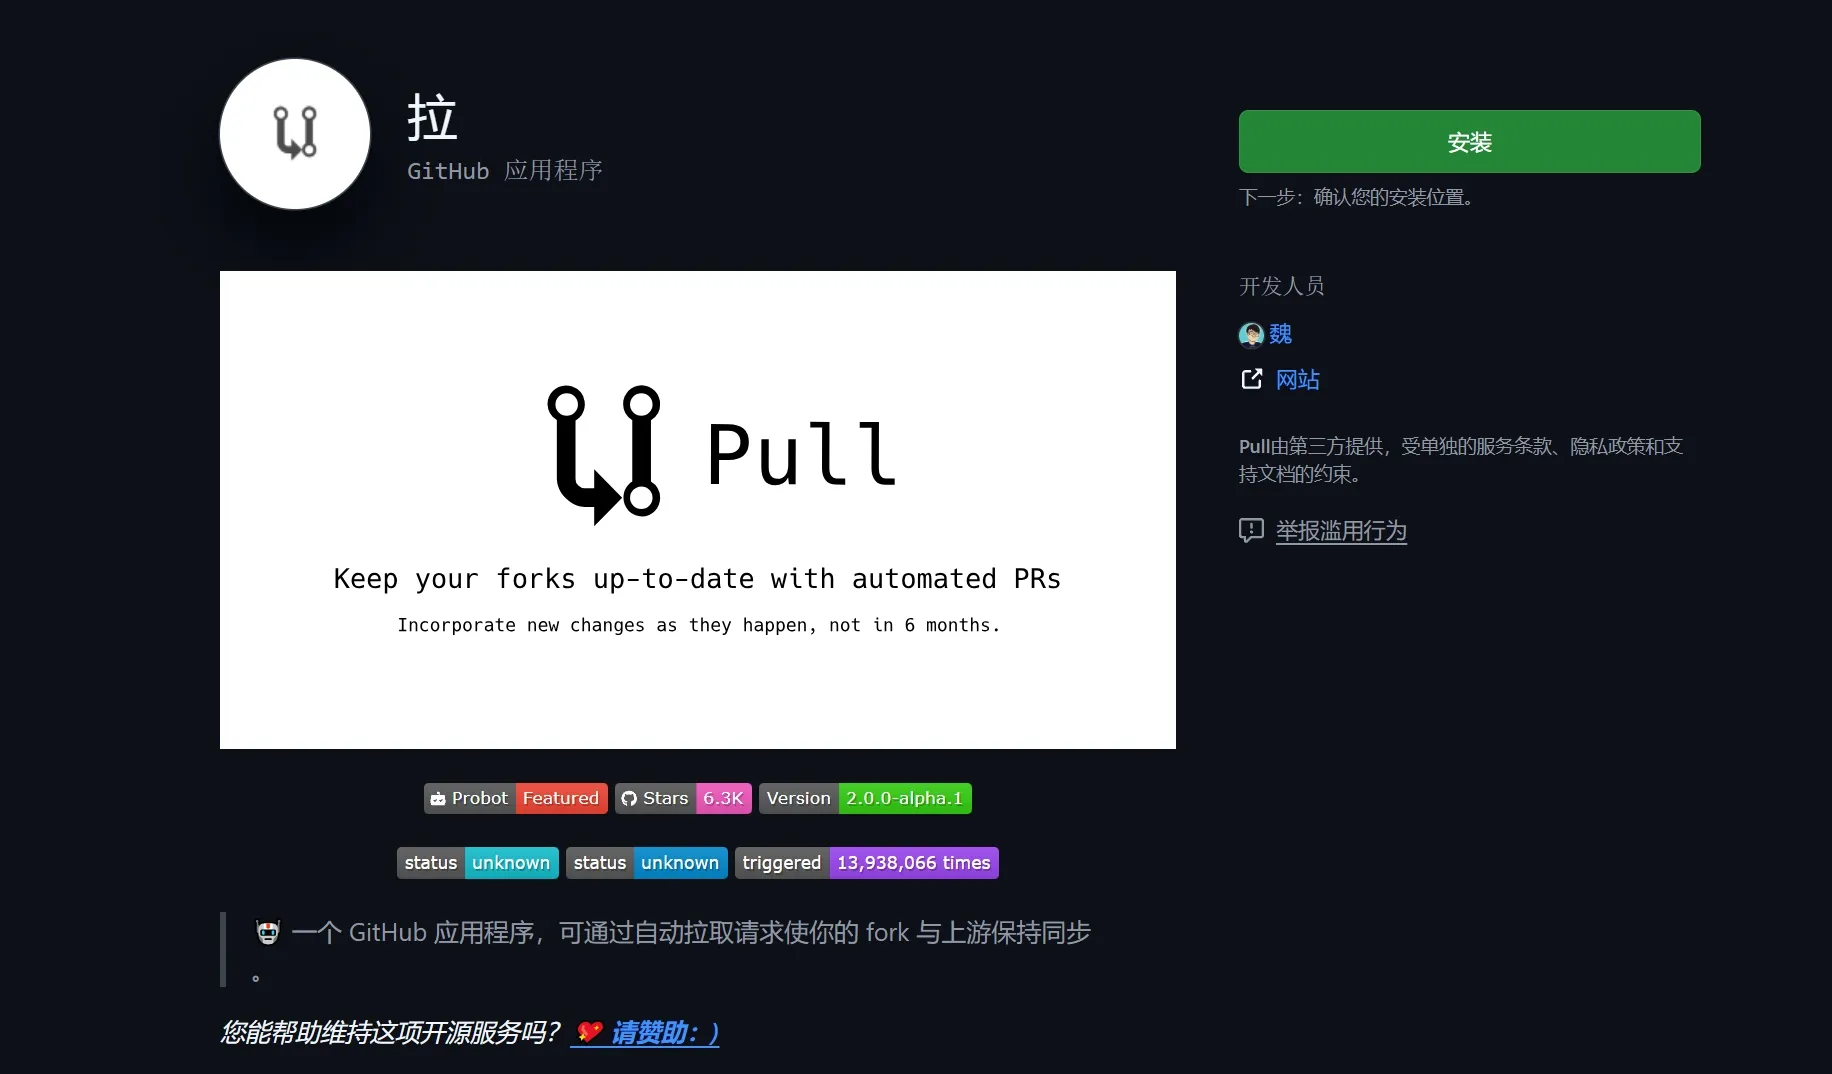
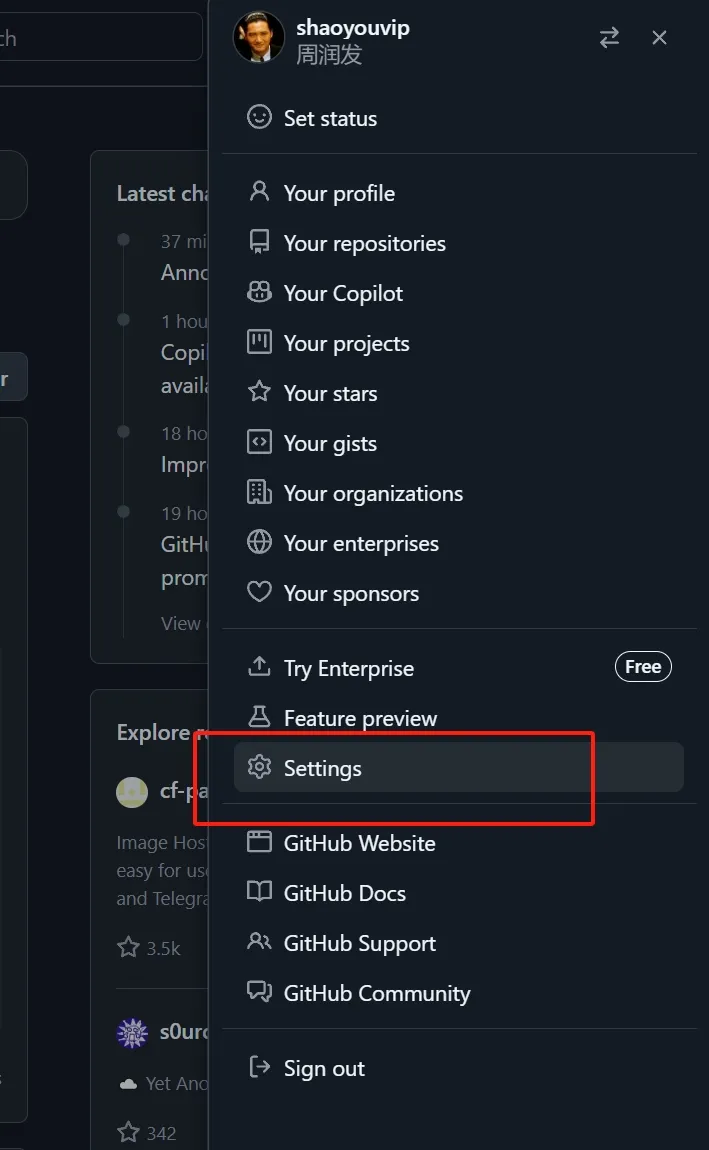
使用 Pull 自动同步(第二种方法 )
-
设置 Pull 帮助我们和上游保持一致同步
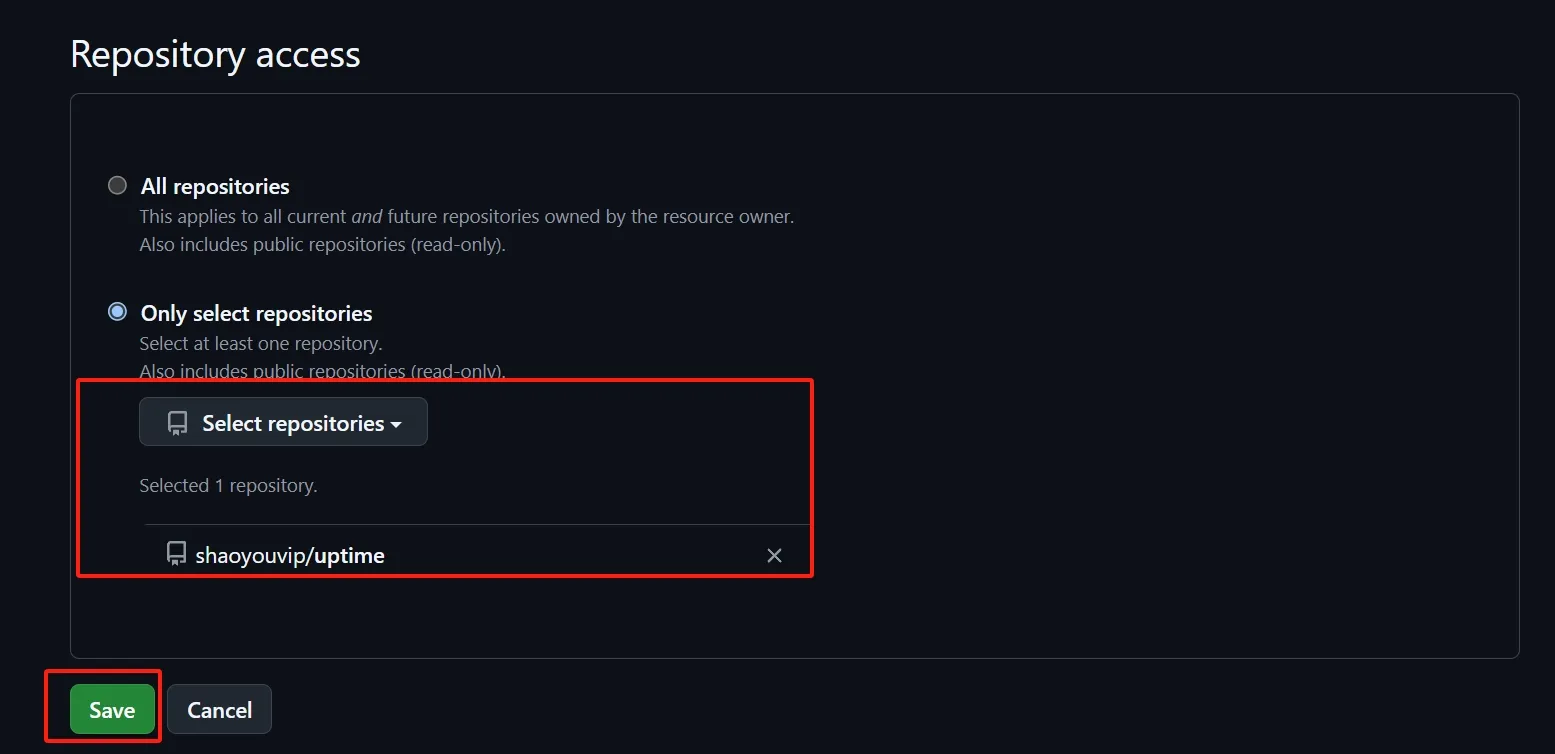
- 打开 设置pull 点击右上角安装,选择你的账户。
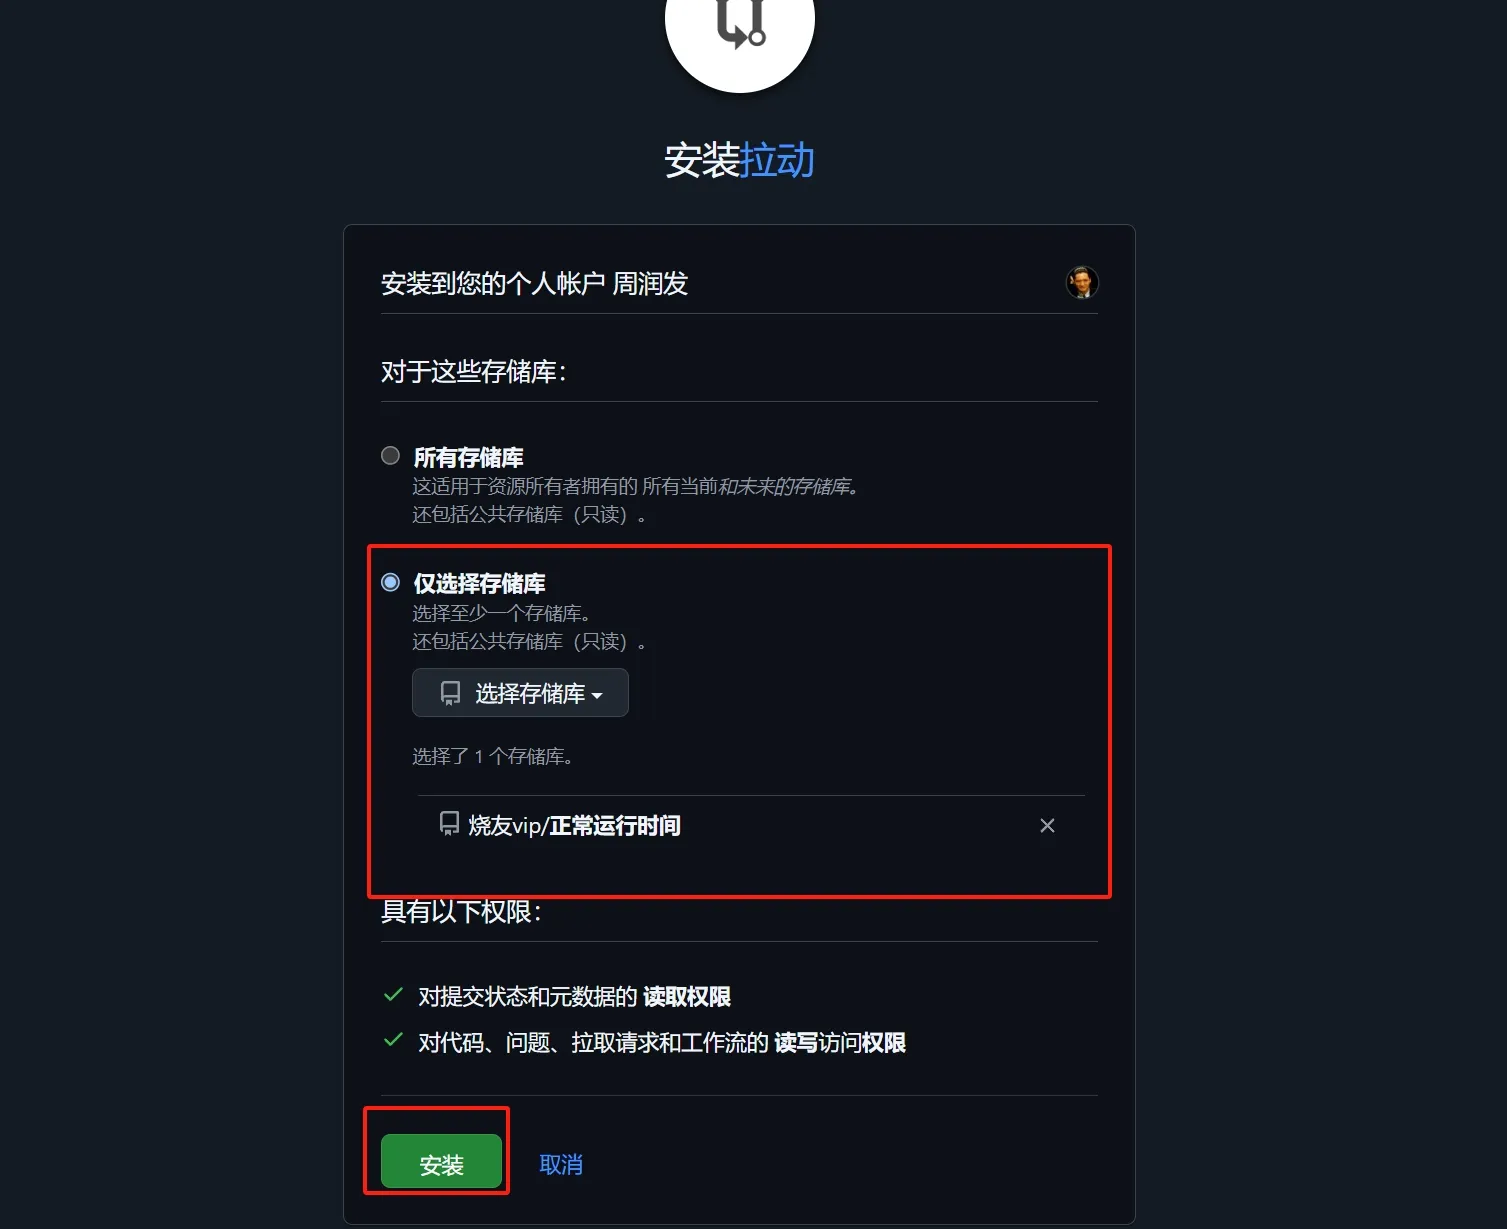
- 选择你要同步的项目,选择储存库不要选所有储存库,有些项目并不是最新的就是好的。你自己选择。
- 下次如要添加新的项目同步可以在你的Github 账户设置
- 找到 Applications 应用 Configure 配置你的 新项目

- 选择你要同步的项目就可以了,完事结束!
声明:
-
本文转载自周润发